How to use MovieClip Transition Effect tutorial
home » flash components » transition effects » movieclip transition effects v3 » how to use movieclip transition effect tutorial »
1. First you need to make sure that your MovieClip Transition Effect is installed. Open Adobe Flash CS3, create a new file (File/New/Flash Document) and look for the MovieClip Transition Effect component in the Components window (Ctrl+F7 on Windows; Command+F7 on Mac) on the V3 Components - Jumpeye. If you can't find the component, you need to install it (see How to install a MXP file tutorial).
2. Please complete the Create a Simple Movie Clip tansition Effect tutorial before continuing with this tutorial.
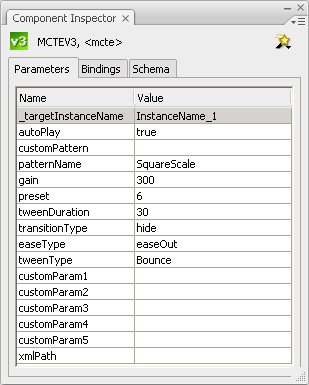
3. By default, the patternName field from Component Inspector is set to "SquareScale". Let's set some new custom parameters for this pattern (you can find the full list of custom parameters here). I've set the preset field to "6" (this sets the movie clip to load from left and right concomitant, to middle), the gain field to "300" (this changes the time delay between the appearing of the next square in matrix), the transitionType to "hide" (this will hide the movie clip in stead of showing it), the tweenDuration to "30" (this will load the movie clip slower then the default) and the tweenType to "Bounce" (ads a bounce effect to the loading squares). The customParam1,2,3,4 are aditional slots for settings, allowing you to control more features on the used pattern type. They are different for each pattern or they can be inactive for some of them. For the "SquareScale" you can use the custom parameters to control the square width and height (I left them blank because those parameters are optional). If you want to try them out, insert a number (pixels) in the customParam1 and customParam2 field for the width and height, but you'll get another result then I did. For this pattern type, customParam3 and 4 are inactive. For further info on the other settings available for this parameter, please read here the full list. This is how the component Inspector should look :
4. Hit Ctrl+Enter to compile your swf movie. This is how it should look :

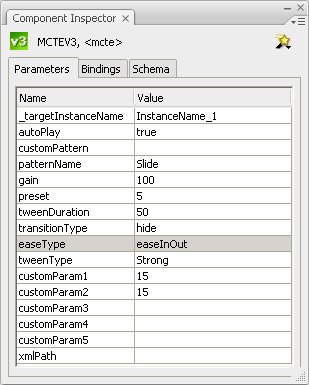
5. Now lets try a different pattern type. Set the patternName field to Slide(performs sliding in and out transitions), the preset field to 5 (this will set the parameter to the custom pozition, option that works along with the customParam1 and custom Param2), the gain to 100(the amount of blur while sliding), the transitionType to hide, the tweenDuration to 50, the tweenType to Strong and the customParam1 and CustomParam2 to 15(customParam1 - the horizontal point that the movie clip will arrive/leave; customParam2 - the vertical point that the movie clip will arrive/leave). This is how the Component Inspector should look like:
6. After compiling the swf movie this is what you should get:
7. There are many other pattern types available for this component in Component Inspector. For more info on the other pattern types, parameters and other setting for the Movie Clip Transition Effect please read the full documentation here.