How to use custom patterns for the MCTE
home » flash components » transition effects » movieclip transition effects v3 » how to use custom patterns for the mcte »
1. The Movie Clip Transition Effect V3 component comes along with 9 different pattern types as default. The only thing that you have to do for applying anyone of those patterns is to select one from the patternName field in Component Inspector, no coding necessary (Movie Clip Transition Effect needs to be installed on your system and present on your Flash stage). Go ahead and give those patterns a try.
2. If you feel that you need something different then the default patterns, Movie Clip Transition Effect supports custom patterns as well. You can purchase some other cool patterns that can be applied to this component (for example check out the Square Pack here). Because many clients have special demands, we continuously develop new types of patterns, so make sure that youve seen our entire offer.
3. After purchasing the new pattern type, you need to install it just like a regular mxp extension. If you need help on installing the pattern, please read the How to install a MXP extension tutorial .
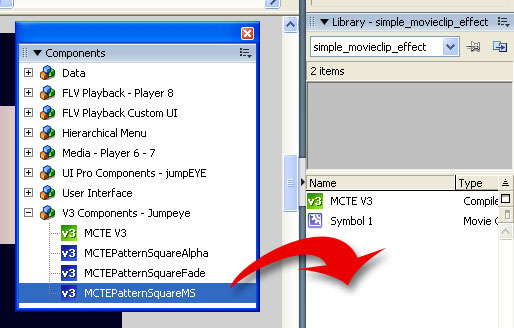
4. If the pattern has been installed successfully, open your fla file and drag the the pattern from the Components window to the Library. Ive installed the Square Pack patterns and Ive chosen the MCTE Pattern Square MS:
5. Next set the MCTEs patternName field to customPattern and in the customPattern field type the name of the pattern that youve installed (in my case MCTEPatternSquareMS). This is how my Component Inspector window looked like:
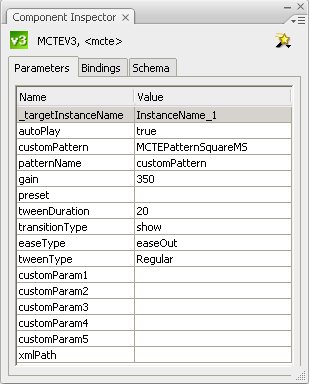
Once you've applied a custom pattern, all other parameters will be applied to the custom pattern. In this case, when the MCTEPatternSquareMS is installed, the customParam1 to customParam5, gain, preset, transitionType, TweenDuration, tweenType will be applied to the square pack pattern.
6. Now all you have to do is to compile your movie (Ctrl+Enter) to see your new pattern in action: