Create a gallery with Thumbnail Slider+LoaderV3+MCTE
home » flash components » transition effects » movieclip transition effects v3 » create a gallery with thumbnail slider+loaderv3+mcte »
1. In this tutorial well try to build a professional slideshow in a few easy steps using 3 components together: Thumbnail Slider, Loader Pro V3 and the Movie Clip Transition Effect (MCTE). /*for an additional effect well add a special pattern to the MCTE.*\
2. Log in to our website at http://www.jumpeyecomponents.com if youve already created an account. If you didnt, please sign up for one. You need to be logged in so you can download the trial versions of the components above.
3. Follow the links bellow and download the free packs with the trial files:
a. Thumbnail Slider
b. Loader Pro V3
c. Movie Clip Transition Effect
4. Install the mxp files for all the 3 components. If you need help installing those files, please read the How to install a MXP extension tutorial here.
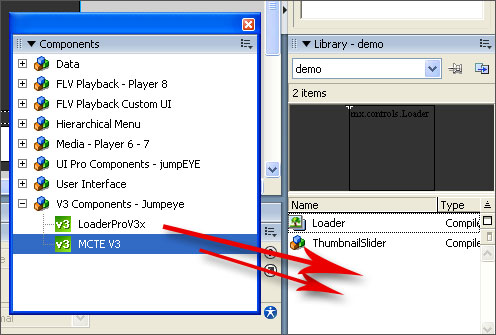
5. Open the demo.fla file that came along with the Thumbnail Slider (search here: ThumbnailSliderTrial /demo/demo .fla) and then, drag the Loader Pro V3 and MCTE from the Components window to your library:
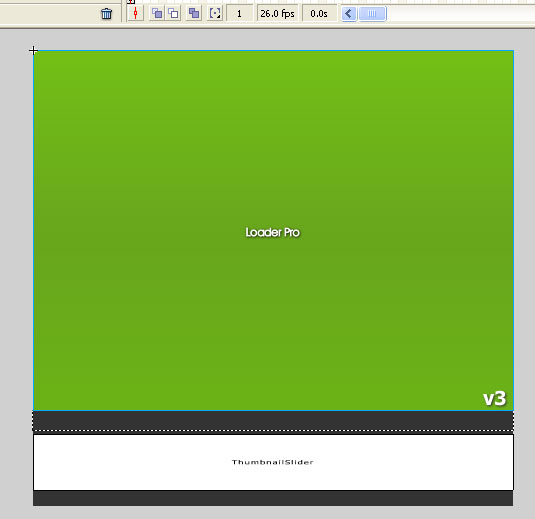
6. Select the default mx loader component thats on your Library and delete it. Replace that loader with the Loader V3 Pro by dragging it on the stage in place of the old one. Set the new loader dimensions and position to fill up the blank space above the dynamic text field (width= 600; height= 450; x=0; y=0). This is how your stage should look like:
7. Give the loader on stage an instance name (Ive named it loader):

8. Select the Thumbnail Slider on stage and type in loader on the targetDisplay field from Component Inspector :

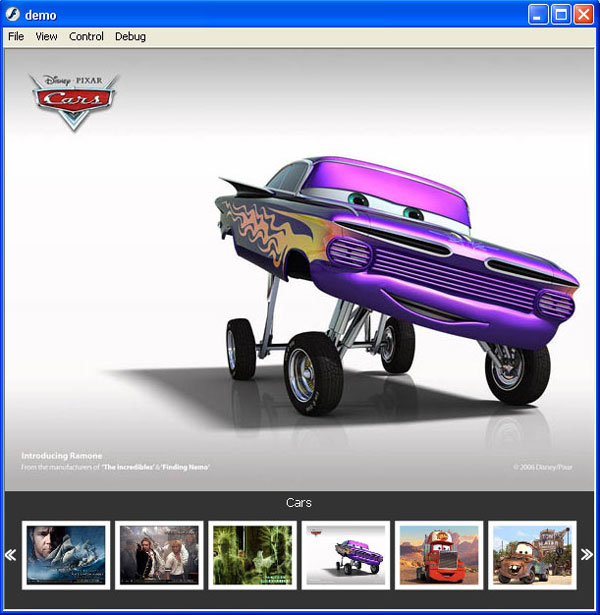
9. Compile your movie (Ctrl+Enter) to see if you have successfully replaced the default mx loader. If you did so when you click a thumbnail picture, the correspondent large one must be displayed:
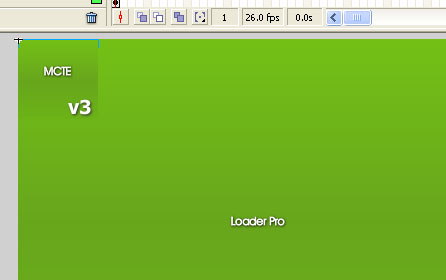
10. Drag an instance of the MCTE on stage over the Loader (it will automatically snap to its upper left corner):
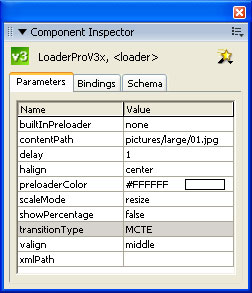
11. Select the Loader Pro insert the large pictures path in the contentPath and on its transitionType field choose MCTE:
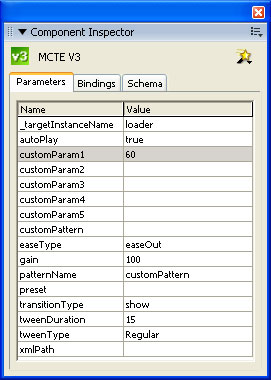
12. Select the MCTE on stage and set the following parameters in Component Inspector :
a. patternName = SquareScale
b. customParam1 = 60
c. gain = 50
d. preset = random
e. tweenDuration = 10
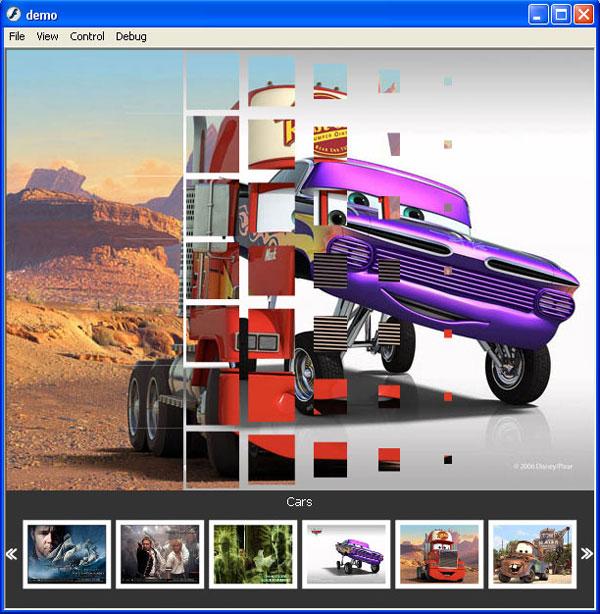
13. Compile your movie to see if the MCTE works:
14. I've also installed the Square Pack pattern for the MCTE. You can download it here. For further reference on how to use custom patterns for the MCTE please read this tutorial but youll need to purchase this pack only if you want to use it too. Ive picked up the MCTEPatternSquareFade, set it up in Component Inspector and then I compiled the movie with the new pattern.
Download the source files of this gallery in order to see how it works. This gallery was created with the trial version of these components that's why it will work only inside your Flash IDE.
Download the source files for this tutorial