Create a text effect using action script
home » flash components » transition effects » txeff full license » create a text effect using action script »
1. This component can also be used with ActionScript to apply effects on different text fields. In the next tutorial we will be creating a text field and apply an effect on the contents, using only ActionScript. First, make sure that you have correctly installed the TxEff component. Next, open your Flash CS3 application, create a new ActionScript 3.0 Flash file (File -> New -> Flash File (ActionScript 3.0)) and save it as "TEwithAS.fla". Now, you need to set up the stage: set the frame rate to 30 fps and set the background to black.
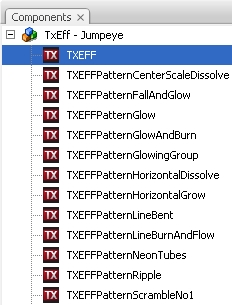
2. Next, from the Components Panel drag the TxEff component into the project's Library and not on the stage (you can find the component in the TxEff Jumpeye folder).
3. To continue, you need to add into the Library all the fonts you'll be using for the text field, since the text font needs to be embedded into the clip for the effect to be visible. If you don't know how to add fonts into the Library, please follow the instructions presented in the Embed fonts tutorial found in this package. Add the following fonts to the Library: Arial with bold type face and Verdana with italic typeface.
4. Now that we have all the necessary elements for our clip, you can bring up the Actions Panel (Window -> Actions or press F9). Now we need to import the event class for the TxEff component (TXEFFEvents), located in the com.jumpeye.Events package and a few auxiliary classes for the TextField instance. Next we can create the text field and set it up. It is important to set the text field to be "dynamic", the anti-alias to "Anti-alias for Animations" ("normal"), embed the fonts and use html text as content for the text field. The content for the text field should be set from the htmlText parameter of the TxEff component instance and not from the text or htmlText parameters of the text field. Finally we are attaching the TxEff component from the Library, set a few properties and set up some event listeners for it, so we can know now when the transition starts and ends.
Note: As mentioned, you should use the htmlText parameter which accepts a string representing a HTML formatted text. For any details on what kind of HTML tags does the text field support, please see the documentation for htmlText parameter of the TextField class in the Flash CS3 help or on Adobe livedocs (http://livedocs.adobe.com/flash/9.0/ActionScriptLang RefV3/flash/text/TextField.html#htmlText).
	// We need to import the events class for the TXEFF component

	import com.jumpeye.Events.TXEFFEvents;

	// We need to import some auxiliary classes for the text field.

	import flash.text.AntiAliasType;

	import flash.text.TextFieldAutoSize;

	import flash.text.TextFieldType;


	// Create the target text field and set it up to display

	// the text we want.

	var txtField:TextField = new TextField();

	txtField.type = TextFieldType.DYNAMIC;

	txtField.autoSize = TextFieldAutoSize.LEFT;

	txtField.selectable = false;

	// The NORMAL value is recommended for text anti-alias.

	txtField.antiAliasType = AntiAliasType.NORMAL;

	// The fonts have to be embedded.

	txtField.embedFonts = true;

	txtField.x = 100;

	txtField.y = 100;

	txtField.name = "txtField";

	this.addChild(txtField);


	// Create the TXEFF component instance using action script

	// and set it up to apply the effect on our text field.

	var txtEff:TXEFF = new TXEFF();

	this.addChild(txtEff);

	// First, you need to add the effect component to the Display

	// List and only after that, you can set the _targetInstanceName

	// parameter, otherwise you will get an error message.

	txtEff.tweenDuration = 3;

	txtEff.patternName = "Blur";

	txtEff._targetInstanceName = "txtField";

	// This is the preffered way to set the content for a text field

	// on which the TxEff component is applied (basic HTML knowledge

	// recommended).

	txtEff.htmlText = "<p><b><font face=\"Arial\" size=\"20\" color=\"#FFFF00\">This is a text </font></b><i><font face=\"Verdana\" size=\"20\" color=\"#FF0000\">for animation...</font></i></p>";


	// Add event listeners to the TxEff component instance, so we know

	// when the effect starts and when it ends.

	txtEff.addEventListener(TXEFFEvents.TRANSITION_START, startHandler);

	txtEff.addEventListener(TXEFFEvents.TRANSITION_END, stopHandler);


	function startHandler(evtObj:TXEFFEvents):void {

	     trace("Transition has started...");

	}


	function stopHandler(evtObj:TXEFFEvents):void {

	     trace("Transition has stopped...");

	}
5. To test the above code just copy it and paste it into your .fla file's Actions panel and test your movie (Ctrl+Enter Windows; Command+Enter Macintosh).
You can see the result in the next image: the effect applied on the text field and the handling of the TRANSITION_START event.

Note: Instead of setting the _targetInstanceName parameter with a string value, representing the target text field's name, you could use the target parameter which must receive a direct reference to the actual instance of the text field ( txtEff.target = textField; ).
Download the source files for this tutorial