Create a simple MovieClip Transition Effect tutorial
home » flash components » transition effects » movieclip transition effects v3 » create a simple movieclip transition effect tutorial »
1. First you need to make sure that your MovieClip Transition Effect is installed. Open Adobe Flash CS3, create a new file (File/New/Flash Document) and look for the MovieClip Transition Effect component in the Components window (Ctrl+F7 on Windows; Command+F7 on Mac) on the V3 Components - Jumpeye. If you cant find the component, you need to install it (see How to install a MXP file tutorial).
2. Set your Flash document to 400px width and 300px height and 28 fps frame rate as in the image below.
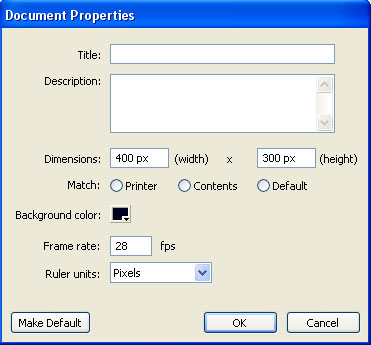
Click OK and save the file.
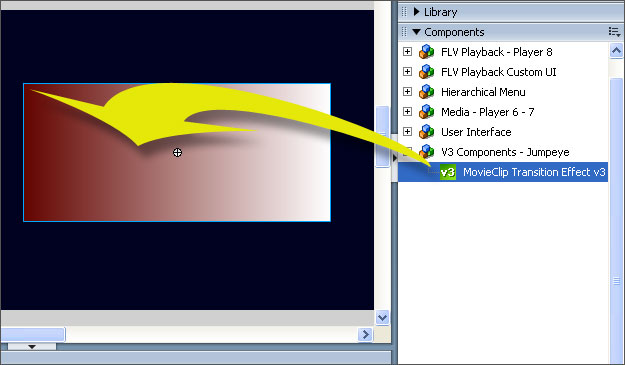
3. Draw whatever shape you want. I drawn a rectangle, I applied a gradient to it and then I converted it into a symbol (F8). I also named the layer holding the rectangle movieclip. This is how my stage looked like :

4. Drag the MovieClip Transition Effect component on stage from the Components palette (Ctrl+F7 or Comman¬d+F7 on Mac) over the movieclip that you just created. If you have any troubles configuring this component press F1 for Help (see How to find Help for Jumpeye components for further reference)
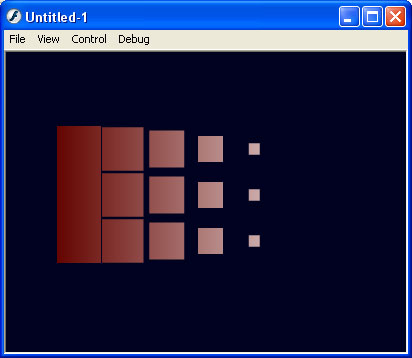
5. The MovieClip Transition Effect is so smart that it will automatically give an instance name to your rectangular movieclip on stage and then interact with it. All you have to do now is compile your movie (Ctrl+Enter or Command+Enter on Mac). This is how your rectangular movieclip should load up :
6. Now you can play with all the settings that MovieClip Transition Effect can handle in Component Inspector.